Spices

Spices

Thursday, December 29, 2011

Butternut Squash and Carrot Soup


My new photo of Butternut Squash and Carrot Soup (non-dairy) (The Souper 2012)

What do you do when there is a brisk chilly feel to the outside air and the wind is howling around the house but it is brilliantly sunny outside? You make soup, of course!
I took out from my refrigerator the very basics for a good hearty, spicy vegetable soup. There was a half of a large butternut squash sitting quietly in my refrigerator along with a large bag of carrots. I discovered a half of a large onion just waiting to jump into a food creation of mine. Supporting the major components of this throw-together soup are my spices always ready to flavor-up a dish.
With a full stock of staples in the pantry, I of course had a box of low-sodium chicken broth to blend into a pot of soup or rice stirfry sidedish.
There you have it. Chopping the vegetables, adding seasonings and broth blends into the most satisfying, creamy tummy-warming soup in just about one half an hour. Yes, from the chop to the blend I was eating not one but two bowls of this velvety smooth liquid meal in under an hour! How wonderful is that?
With the basic kitchen skills and tools, you too can impress yourself as well as your loved ones with a healthy, nutritious pleasure.

Prep time about five minutes. Cooking time about one half an hour.
Serving suggestions: Add soup crackers, or small cooked pasta to a bowl of soup. (If you can tolerate dairy, grate some melting cheese on top of the soup or a tiny bit of cream.)

What you will need:
Cutting board, large
Kitchen knife
Vegetable peeler
Small bowls for chopped vegetables
Large pot with matching cover
Wood spoon
Large soup spoon
Measuring spoons
Pot holders
Immersion blender or food processor (even a blender if soup is cooled.)

Ingredients:
Canola or Olive Oil, 3 tablespoons
1/2 large sweet onion, chopped
1 garlic clove, crushed
1/2 large butternut squash, cubed into small pieces
2 medium carrots, washed, peeled and cut into thin discs
1 box, 32 ounces of low-sodium chicken broth. (Swanson's)
Kosher salt, add during cooking and flavor cooked soup
(about 1 teaspoon during cooking onions, 1 teaspoon when butternut squash and carrots added to the cooking onions. Add 1 teaspoon if needed when soup is finished cooking and still in the pot if more flavoring is needed.)
Crushed black pepper, 1-2 teaspoons during the cooking process
Turmeric, 1/2 teaspoon on top of the cooking butternut squash and carrots
Smoked Papika, 1/2 teaspoon on top of the cooking butternut squash and carrots.

The process:
Wash, peel, cut the carrots and set aside until needed
Peel butternut squash and cut into small pieces
Peel the onion and chop into small pieces and set aside until needed
Peel clove of garlic and crush into small pieces
Add the oil into the large pot and put on the stove burner turned on medium-high heat
Add the chopped onions, some salt and stir with the wooden spoon often.
When the cooking onions look shiny and appear to be softer in texture, add the crushed garlic and keep stirring with the wooden spoon often.
Quickly add the cut butternut squash and cut carrots into the cooking mixture and keep stirring around often with the wooden spoon.
Add more salt, add crushed black pepper as well as the turmeric and smoked paprika and keep stirring with the wood spoon.
When the cooking vegetables appear to be softer, slowly add the chicken broth and keep stirring the mixture.
Reduce the heat under the pot to a low setting, cover slightly with the matching cover.
Check on the cooking soup in about 25-30 minutes, taste a little bit with the clean, large soup spoon and add more salt or crushed black pepper to your personal taste.
The flavors come together with a correct balance of seasonings. (Your tastebus will tell you if more seasonings are needed.)
With the stove burner off, use the immersion blender slowly to blend the cooked chunks of vegetables into a smooth, velvety texture.
If using a food processor or blender, let the soup cool a bit before blending.

Tuesday, December 13, 2011

Lasagne

This Lasagne is both Gluten-free and Non-dairy

It was exciting to find a lasagne pasta made of brown rice so that I could prepare a gluten-free lasagne for people on a restricted diet AND while thinking about dietary needs of others, I decided to make this recipe for lasagne to be dairy-free as well. Did I have concerns how this recipe was going to turn out? You bet I did. Did I have concerns about how a lasagne without cheese would hold up in the cooking process? You bet I did, again.

I am happy to report that this lasagne with ground beef and sauted vegetables turned out to be one of the best tasting culinary experiments I have prepared. There was an abundance of flavor in this meat lasagne from the spiced-up seasonings used during the cooking of the ground beef. The sauted veggies of choice for this recipe added their own flavor and texture to the entire lasagne. How surprised was I? Very surprised and satisfied with this homemade creation.

Although I technically am not restricted to a gluten-free diet, I enjoy the wonderful new products appearing in the markets for those restricting gluten in their nutritional diets. A personal observation: when eating too much bread or white pasta, I find a bloated feeling after a meal and see more puffiness under my eyes. Again, this is just a personal observation. The same feeling is personally observed when eating a lot of dairy products. So, good to know that substitutions of ingredients still allows for a hearty flavor in favorite meals.

Noting here that I chose ingredients for this lasagne without promoting any products. I enjoy their flavors.

Gluten-free, brown rice lasagne pasta. Organic and Kosher, too.

Organic Tomato Sauce with Herbs (no cheese)

What you will need to prepare this dish:
Large pot with matching lid
Colander
Tongs
Large skillet
Large cutting board
Kitchen knife
Box grater
Wooden spoon, two
Pot holders
Large lasagne pan or high baking dish
Olive or Canola Oil spray
Baking sheet
Large spatula

Ingredients:
Lasagne pasta, gluten-free
Olive oil, 3-4 tbs for sauteing vegetables and ground beef.
Small onion, chopped
Garlic, 3 cloves, fresh and chopped
Carrot, 1 large, washed, peeled and grated
Red or Green pepper, 1 medium, washed and cut into small pieces
Butternut squash, 1 cup, fresh, cut into small pieces
Zucchini, 1 small, washed, cut into small pieces
Kosher salt, 1-4 tbs (add half of total amount during vegetable saute; add some salt to taste during cooking process after the ground beef is added but save some salt to add to boiling water for cooking pasta)
Black pepper, 1 tsp, crushed
Ground beef, 1 lb, lean OR White ground meat turkey, 1 lb.
Tomato sauce, one jar prepared tomato sauce of choice (with/without added herbs, but no cheese.)
Tomato paste, 4 tbs from tube or small can
Water, 1 cup, cold (add half of the water to determine thickness of mixture)
Tumeric, 1 tsp, powder
Smoked paprika, 1 tsp, powder
Oregano, 1 tsp, dried
Basil, 1 tsp, dried
Gluten-free bread crumbs

Lasagna Preperation Process:
Fill the large pot with cold water, put lid on the pot and put the pot on a stove burner, high heat, to bring water to a rolling boil. This will take 8-10 minutes depending on your stove temperature. When large bubbles appear in the boiling water, remove the lid, add some Kosher salt and carefully add the dried lasagne pasta. Stir gently to separate each noodle so they do not stick together.
When all the lasagne pasta is softer, but still firm, turn off the burner under the pot, put the colander in the sink and carefully lift the pot with pot holders and slowly drain the boiling water from the pot leaving the partially cooked lasagne pasta in the collander.
While the water is reaching a boiling temperature, preheat your oven to 375 degrees.
At this time put the large skillet on another stove burner, add the olive oil into the skillet and turn the burner under the skillet to medium-high heat. In a minute or two, carefully add the chopped onion and stir around the skillet with a wooden spoon. When the onions look softer add the rest of the vegetables and keep stirring the mixture. Add some of the Kosher salt and all of the crushed black pepper. Keep stirring the mixture with the wooden spoon.
When all the vegetables look softer, add the uncooked ground beef (or ground turkey), add all of the herbs, the tomato paste and continue to stir with the wooden spoon until the ground beef (or ground turkey) turns brownish, more firm looking texture to the meat. Then, add 3/4 of the jar of tomato sauce. (save 1/4 of the tomato sauce for the top of the lasagne before baking)
Keep stirring the mixture above and then add the water, as much as needed for the desired consistancy of the mixture. The mixture of vegetables, meat and sauce should not be too watery.
Turn the temperature under the skillet with cooking mixture to a low setting and keep stirring with the wooden spoon until cooking mixture is fully heated and bubbles begin to form in the mixture.
Turn the burner off under the skillet after the mixture is hot and bubbly.
Spray the large baking dish with some olive oil spray to keep the bottom of the lasagne from burning while baking.

The Layering Process Before Baking:
With a clean wooden spoon, add a little bit of the cooked mixture from the skillet to the bottom of the baking dish.
With tongs, carefully take several partially cooked lasagne pasta and put them on top of the first layer of cooked ground beef (or ground turkey) and vegetable mixture. Add a bit more cooked mixture on top of the lasagne pasta and repeat this process until the top layer is cooked meat and vegetable mixture.
Add a thin layer of gluten-free bread crumbs for a crunchy topping (optional)
Add last 1/4 of jar of tomato sauce to the top of the lasagna.
Put the baking dish on a clean baking sheet so oven will not get messed up if the cooking lasagne overflows with tomato sauce.
Put the baking sheet with the lasagne baking dish on it into the preheated oven.
Bake the lasagne for about 20-30 minutes until heated totally in the middle.

Serving suggestions:
Cut the cooked lasagne into large squares and serve each individual portion with a spatula on a dinner place.

Saturday, December 3, 2011

Chicken Soup


Chicken Soup in Natural Light - my personal photo (The Souper 2012)

When I was a little kid home with a bad cold, my nose stuffy, chills running through my body from a fever and all I wanted was to be comforted and be held in loving arms. With a scratchy throat I did not want to eat anything solid that I had to chew and I did not want to talk.
Ah, but then warm, soothing relief came in the form of a bowl with steam rising out of it. My Mom brought me her homemade cold remedy, Chicken Soup! As the steamy bowl of soup came closer to my face, breathing became a little bit easier. Then a spoonful of hot soup reached my mouth. My dry lips from breathing from my mouth felt moistened as soothing liquid entered my waiting lips. The first drops of this salty, tasty warmth slid down my sore throat. "Mmmm," automatically came as my first words since being sick. I wanted more soothing soup immediately. I began spooning this miracle liquid faster. The warmth ran through my body and then my nose started to drip from the hot steam of the soup and I reached for the tissue box. Yes, I was beginning to breathe again. What a miracle!

Fresh Chicken Soup is easy to prepare. Prepare some for your family and friends. A big potful of soup will make several quarts. Freeze some for the times when you need this wonderful relief from a cold and congestion. Or when you just want comforting memories, defrost and heat a quart of fresh Chicken Soup and get your bowl and spoon ready for your treat.

What you will need:
One large soup pot with matching lid
One whole fresh chicken (about 3 lbs) or assorted chicken parts of choice.
One large onion, fresh
Carrots – 3-4, fresh
Celery – 1-2 stalks, fresh
Parsnips – aka white carrots (optional), 1-2 fresh
Cold water – enough just to cover the chicken (NOT to fill whole pot)
Kosher salt – several tablespoons to begin with. Add more to flavor when final tasting the soup.
Soup ladle
Small bowl
Large spoon
Large spoons with holes or strainer with handle
Large bowl or platter

Preparing Chicken Soup:
Take out any inner plastic bag full of giblets, remove chicken neck for soup but other giblets not needed for the soup.
Rinse fresh chicken (inside and out) or chicken parts with cold water and pat dry.
Put the chicken or chicken parts into the large soup pot
Add cold water only to cover the top of the chicken, not any more. This will make a more flavorful chicken broth instead of a watery, diluted broth.
Cover the pot with matching lid and turn stove burner to medium high heat.
Wash, dry and peel carrots, celery and/or parsnips.
Peel the whole onion and do not cut it.
When you hear the water boiling or see steam escaping from under the lid, carefully take off the lid and turn down the heat of the stove burner to medium heat.
At this time take a large spoon with a small bowl to collect the foam off the top of the soup. This is called skimming.
Discard all of the foam that you have collected from skimming the soup.
While the soup is still at a rolling boil, add the vegetables.
Add the Kosher salt
Return the lid partially back on the soup pot while cooking continues.
Lower the stove burner to low heat.
Continue to cook the soup for about an hour and a half to two hours. The chicken should be floating to the top of the pot and the meat should be tender.
Carefully taste the soup for salt content. Add more Kosher salt at this time to your personal taste.
Turn off the stove burner under the pot, remove the lid.

Serving chicken soup:
Carefully lift the chicken or chicken parts out of the pot with large spoons with holes or strainer with handle. Put chicken in/on a large bowl or platter. Let chicken cool a bit and then take meat off the bones. Discard skin and bones of the chicken.
Remove the celery, onion and parsnips from the soup pot and discard.
Keep the cooked carrots for serving in the bowl of soup.
Ladle soup into a small serving bowl with pieces of the soft, cooked carrot.
Add some cooked chicken meat into the bowl.
Now enjoy a steaming bowl of wonderful, flavorful homemade chicken soup
Options: add some soup crackers to your bowl or cooked thin soup noodles or small pasta.

Wednesday, November 30, 2011

Cookies

Cookie Monster's Famous Cookie Dough

Thinking about cookies makes me happy. What a perfect little treat to hold in my hand with each bite bringing me pleasure to all senses. First the visual, eye-opening appearance to the inhale of sweet scent, to feel texture, hear crunch, taste flavor and experience comfort in the total eating process, producing a mouth-watering sensation for my taste buds.

I have many cookie recipes in my collections to choose from with unlimited flavors. So where do I begin? I went back to the basic sugar cookie or butter cookie. Wanting to keep it simple for our early family Hanukkah Party to include children of all ages as well as adults carefully watching their calorie intake at our family feasts, I choose one of my first cookie recipes from a Sesame Street Cookbook called “Cookie Monster’s Famous Cookie Dough.” Who else would know more about cookies than Cookie Monster, right? This recipe is a very classic, easy-to-follow recipe with quality ingredients producing a rich taste on the palate, yet easy on the sweetness scale of flavor. These cookies bake quickly and can be decorated for all occasions using cookie cutters and icing of choice.

A very simple sprinkle of a cinnamon-sugar mixture on these cookies while baking will bring the memories of baking at home when you were a child. What is more comforting and satisfying than a warm, sweet smell floating through your home?

To “party-up” these cookies a sprinkle of some gold, granular sugar on the star-shaped cookies gives an appearance of a glow coming out of the cookie as well as a little more flavor and crunch. On other cookies in this collection I choose to outline in blue icing to highlight the shape of the toy Dreidle that children play with at a Hanukkah Party. The icing gives a little more sweetness to this cookie as well as more visual affect.

Cookie Platter

What you will need:
Large Baking Pans - two
Parchment Paper
A medium-sized mixing bowl
Measuring cups
Measuring spoons
A Hand Mixer
A Wooden Spoon
A Spatula
Plastic Wrap
Rolling Pin
Cookie Cutters
Oven Mitts
Cooling Racks

Ingredients:
Butter, unsalted, 3/4 cups
Sugar, white granulated, 1 cup
Eggs, two whole eggs
Pure Vanilla, 1 teaspoon
All-purpose Flour, 2-1/2 cups plus extra flour for rolling out dough
Baking Powder, 1 teaspoon
Salt, 1 teaspoon
Optional for decorating: cinnamon, sugar, icing or frosting

The Process:
Preheat oven to 350 degrees
Cookies bake for about 11-12 minutes or until slightly browned around the cookie.
In a mixing bowl, put the butter into the bowl and put the sugar on top of the butter in the mixing bowl.
With the hand mixer on low setting, blend the sugar into the butter until creamy smooth.
Crack eggs into the butter-sugar mixture.
Add the vanilla to the mixture also.
Blend the eggs and vanilla into the mixture in the bowl on low setting.
Add the flour, the baking powder and the salt into the above mixture and blend into the mixture in the bowl with the wooden spoon.
With all ingredients blended together, wrap the cookie dough into two round balls, flatten with your clean hands into two-inch thickness portions and wrap in plastic wrap.
Put the wrapped cookie dough into the refrigerator for a least one hour before rolling out to cut into shapes for baking.
When cookie dough is chilled, remove plastic wrap and sprinkle a little bit of flour on the clean surface to roll out the dough to about 1/4 to 1/2 inch thickness. (flour the rolling pin also while rolling out the dough.)
With a cookie cutter, cut out shapes and put uncooked cookies onto lined baking pan with parchment paper.
Combine cookie dough into a smaller ball after cutting out cookie shapes and repeat cutting shapes from the smaller ball of dough that has been rolled out again.
Sprinkle cinnamon and sugar onto the cookie before baking or just after taking the cookies out of the oven when they are still warm.
After baking, take the cookies off the baking pan with a spatula and put them on baking racks.
Icing or frosting should be done when the cookies have cooled down to room temperature.

Monday, September 26, 2011

Applesauce

Applesauce

If it is fall in New England then it is time to go apple picking. This is an annual event in my family and has bonded our family for many years. What better way to experience first hand how a favorite fruit grows and is incorporated into homemade apple pies, apple crisps and of course homemade applesauce! Tasting different varieties while in the apple orchard tempts us to try many varieties of apples. Shining one up after picking, before eating this natural treat, is part of the adventure of a visit to the local apple orchard.

We pick mostly Cortland apples for our baking pies and crisps and making applesauce. Macintosh (Macs) and Granny Smiths can be combined in many favorite recipes.
A good eating apple is a Gala, Fuji and Macoun as well as Honey Crisp. These are firm and sweeter varieties. If you crave that lip-puckering tartness of a crisp apple, go for the Macintosh.
From our tutorial on apple varieties right there in the apple orchard, we learned that Cortland apples do not get brown as quickly when cut into pieces, therefore, they make a good baking apple.

The process for making fresh applesauce is simple to follow. There is nothing better than the taste and consistency of homemade applesauce. Try it and be proud of the quality of your efforts.

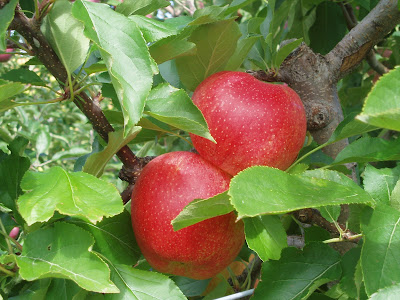
Cortland Apples

A Cortland Apple


What you will need:
Cortland or Mac Apples
Large Pot with matching cover
Cutting board
Kitchen knife
Wooden spoon
Measuring cup
Food mill
Large bowl

Ingredients:
Cortland applese or mixture to include Grany Smith and/or Macintosh
Water, about 1/2 cup
Cinnamon, about 1 tablespoon or to taste
Sugar, about 3-4 tablespoons or to taste

Cut apple

Cut apples in large pot


The Process:
Wash all apples before cutting
Cut the apples with the kitchen knife on all sides close to the core
Add all cut apples including the cores, put into the large pot with the water.
Put the pot on the stove burner, turn heat up to medium-high at first.
Cover the pot.
When the apples begin bubbling in the water, turn down the stove burner to low setting.
Keep the cover on the pot and check on the cooking apples often, turning them over in the pot with the wooden spoon.
Cook the apples down until a bit mushy, but still solid.
Take the cover off, turn off the stove burner and let the apples cool a little bit.
With the food mill in place over a large bowl, spoon in the cooked apples into the food mill and begin to turn the handle to press the cooked apples through the strainer in the food mill.
When all the cooked apples have been put through the food mill, add cinnamon and sugar, and stir through the mixture.
Adjust the cinnamon and sugar for your personal taste.
(Flavor from cooked apples is different depending on the varieties of apples used.)
Serve the fresh applesauce at room temperature or keep in the refrigerator until a later serving time.
The applesauce firms up after refrigeration and the flavors blend together.

Sunday, September 4, 2011

Stirfry

Chicken and Shrimp Stirfry

At what age did you become responsible for your own meal preparations? Are you a young adult, living independently from your family, and relying on take-out food or easy pick-up, prepared meals from the supermarket? If you notice this is your regular meal planning stategy for satisfying your immediate hunger pains, then have you also noticed that your weight is increasing as you continue these eating habits?

This blog post is about how Scott took a desire to eat healthier by preparing a meal at home with ingredients he chose himself. Scott also increased his time at the gym during the week. When possible, Scott is making better food choices for his overall health. Scott is in his early thirties, lives independently in his own home, has a very busy business career involving lots of travel and has lots of social events with friends involving food, of course.

This fresh stirfry dinner was prepared by Scott, on his own. He thought ahead what he wanted to prepare for his dinner, went to the supermarket to purchase fresh ingredients and took a little time to organize and cut his produce and protein before beginning the cooking process. Scott, without knowing, utilized the process of "Mise En Place" meaning everything in its place before cooking. This is how the chefs cook in restaurants. By having all the ingredients of a meal washed, cut and measured just before you begin the cooking process, allows you to efficiently introduce each ingredient into the cooking process. Therefore, less frustration and chaos while cooking. The result is a smooth, organized, stress-free prepared meal.

"Mise En Place" - Organizing ingredients, everything in its place.

Another thing Scott shared with me is a couple of photos of his meal preparation. He even presented his photos on white dishes which is the choice of the professional food photographers, as I have learned as well.

I think Scott took responsibility to prepare a healthy, nutritious meal at home and gained some confidence during the process of preparation and cooking. With a tasty dish like this stirfry, imagine what other home cooking meals await Scott? By controlling the ingredients during home cooking, Scott controls the salt, sugar and fat content and does not let others do this for him. This is a much better way to eat for your overall health, I think. How about you?

Reminder: cut fresh produce first and put into medium bowls. Wash kitchen knife and cutting board to cut the chicken tenders and put pieces into medium bowls. Wash kitchen knife and cutting board again to cut the shrimp and put the pieces into a medium bowl. This prevents cross-contamination of food.

What you will need:
Large cutting board
Kitchen knife
Large fry pan or skillet
Large spoon, metal or wooden
Medium bowls for ingredients (3-4)
Serving plate
Serving spoon, large
Fork and knife

Ingredients:
Olive oil or vegetable oil, two tablespoons
Green pepper, small to medium, chopped into small pieces
Red onion, small, chopped into small pieces or slices
Chicken tenders, fresh and skinless, cut into small pieces
Shrimp, fresh, shelled, cleaned and deveined
Kosher salt, one teaspoon
Black Pepper, crushed, one-half teaspoon
Optional: one teaspoon soy sauce, low sodium.

Cooking process: Fast, total cooking time about five minutes.
Add the olive oil or vegetable oil into the fry pan or skillet. Turn heat on stove top to medium-high.
Add the red onions and green peppers and stir as they cook in the oil.
Sprinkle the salt and crushed black pepper on top of the cooking vegetables.
When the cooking vegetables look softer add in the chicken and keep stirring the mixture. When the cooking chicken looks like color has changed from pinkish to more white color and looks firmer, add the shrimp and keep stiring the mixture. If adding low-sodium soy sauce, add this now and keep stirring to cover all the vegetables, chicken and shrimp.
When chicken is white color and shrimp is more firm and pink color, stir and taste the stirfry.
Add more salt and black pepper for your personal taste.
Turn off the stove top burner and put the cooked stirfry on a clean plate using a clean large serving spoon.
Bring the serving plate to the table where your clean fork and knife have been placed for you to enjoy your home cooked stirfry meal.


Thursday, August 11, 2011

Salsa


Gathering my fresh produce definitely stimulates my imagination. The colors inspire me to create in the kitchen. Today I must make fresh Salsa. I will include fresh sweet corn I just picked up from my local Farmers' Market.

This fresh, colorful Salsa is sure to please the pickiest of palates. The seasonings bring warmth and mix well with the cool, cut vegetables creating the perfect blend for my tastebuds. Did I mention how healthy this Salsa is? It sure is :)

Serving Suggestions: Tortilla chips, Corn Chips in the shape of scoops, Hearty Bread drizzled with fresh olive oil, baked on a baking sheet in the oven at 400 degrees F. until browned. When cooled, cut in triangles for better scooping of the Salsa.

What You Will Need:
Large cutting board
Kitchen knife
Large bowl
Large spoon
Matching cover to the bowl or clear plastic wrap.

Ingredients:
Tomatoes, two fresh, medium or one fresh, large.
Green and Red Peppers, one half of each color pepper.
One half Sweet Onion, Vidalia or a Spanish Red Onion.
Garlic, three cloves, peeled.
Corn on the Cob, two whole ears, cooked kernals of corn.
Easy microwave cooking instructions for the corn below:
(peel the husks of corn, wash in cold water, wrap in wax paper and microwave for 4-6 min. on high. The corn will steam. When cooled, cut corn kernals off the cob and add to the bowl of cut veggies.)
White Vinegar, one teaspoon.
Lime juice, one half fresh lime.
Kosher Salt, one half teaspoon.
Black Pepper, one quarter teaspoon, crushed Pepper
Red Pepper Flakes, one quarter teaspoon.
Optional instead of Red Pepper Flakes use chilies of choice, one or two small, chopped.
Chopped Cilantro or Fresh Flatleaf Parsley, one half teaspoon.


Walsh the vegetables and dry them before cutting into small pieces on the cutting board.
Put the cut vegetables into a medium bowl and season with the rest of the ingredients above.
All flavoring is up to personal taste, so be sure to taste the mixture often.
The final mixture will marinate, covered with plastic wrap or matching cover to the bowl, in the refrigerator for several hours or better when left overnight.
It is helpful to mix the Salsa a few times to blend in the flavors.
Before serving, mix the Salsa with a spoon once again.


Wednesday, August 3, 2011

New Potato and Vegetable Scramble

New Potato and Vegetable Scramble

What is like a Scavenger Hunt? My weekly visit to my local Farmers’ Market starts off with my list in hand, ready to gather fresh produce and baked goodies to bring home to enjoy. As soon as I reach my destination, my excitement builds, my eyes dance around from the assembled tables of each vendor, and I forget the items on my list and buy with my eyes! Knowing the produce I select has not traveled far from the very ground it grew in, makes my choice of vegetables even more special.

Each week the farmers bring the most seasonal offerings to the market. This week I purchased adorable, little new red potatoes. My mind was racing with so many ideas on ways to prepare these little beauties. Then I chose some sweet corn and in my mind I could immediately taste the sweet little kernels dripping in melted butter and sprinkled with a bit of salt to bring out even more corn flavor. Glancing back at my prepared list, I did pick up some summer squash, zucchini and my weekly brownie treat.

With so many recipes to create with my new little red potatoes, I could easily make a sensational mashed potato side dish. Roasting these little ones would bring out their sweet, hearty flavor enhancing their goodness with olive oil, salt and pepper enabling the potatoes to brown and develop a crispy outside surface.

The recipe I would like to share with you is one for a nutritious, comfort breakfast. Starting off a new day with a filling, healthy breakfast allows me to have energy to get on with the day and to reduce hunger cravings before my next meal at lunch time.

I call this recipe New Potato and Vegetable Scramble. Why? This dish is filled with fresh vegetables blended together with the protein of whole eggs or just egg whites, brought together as one meal filled with flavors from seasonings such as salt, pepper and paprika. As the nutritional experts tell us, "eat vegetables and good proteins." The simplicity of all the ingredients produce mouth-watering comfort. You know you have had a good meal after the full feeling you experience after this hearty breakfast, almost wishing for more comfort, but knowing you are totally satisfied and can eat no more.

Total Preparation Time approximately 10 minutes.
Total Cooking Time approximately 10 minutes.

Here are the ingredients you will need for this recipe:


Ingredients for Two Servings:
Olive Oil, 2 tablespoons.
Butter or Vegan Buttery Spread, 1/4 cup.
Vidalia or Sweet Onion, 1/2, chopped
Summer Squash, one small, cut into small pieces
Red New Potatoes, 2-3 small potatoes, cut into small pieces
Large Eggs, 4 whole or optional 7 Eggwhites only, for fewer total calories.
(optional: prepared EggBeaters or Eggwhites from supermarket.)
Kosher Salt, 1 teaspoon
Black Pepper, crushed, 1/2 teaspoon.
Paprika, 1 teaspoon


What you will need:
Large cutting board
Kitchen knife
Large frying pan
Spatula
Small bowl
Whisk or fork
Measuring spoons
Serving plate or bowl

Preparation:
Wash the summer squash, red potatoes and dry them.
With the kitchen knife, cut the onion, summer squash and red potatoes on the cutting board.
Crack the whole eggs into the small bowl and whisk together to blend or if using just eggwhites, separate the eggs into two small bowls. Save the yokes in a covered small bowl and place in the refrigerator. Discard yolks if not using for future recipes.
Put the frying pan on the stove burner and turn heat up to medium-high temperature.
Immediately add the olive oil and the butter at the same time to allow for maintaining the high temperature without burning the vegetables and eggs during the cooking process.


Add the onions into the melted butter and olive oil in the frying pan, keep stirring around with the spatula so the onions do not burn.
Sprinkle some of the salt to bring out the liquid of the cooking onions.
When the cooking onions look shiny and opaque, not clear, then add the summer squash and keep stirring around the vegetables with the spatula.
At this time add more of the salt and the crushed, black pepper.
Now add the cut red potatoes into the cooking onions and summer squash, keep stirring around so these vegetables do not burn.
Sprinkle the paprika on the cooking vegetables and keep stirring.
When the potatoes look softer and a little brown in color, turn down the stove burner to Low Heat.
Add the eggs or eggwhites and let the liquid of the eggs settle smoothly on and around the cooking vegetables.
When the eggs or eggwhites look firm, take the spatula and carefully slip it between the side of the frying pan and the outside edges of the cooking eggs or eggwhites. This keeps the eggs or eggwhites from sticking on the sides of the frying pan and allows for other liquid from the eggs or eggwhites to settle into the outside of the cooking vegetable and egg mixture.
When the vegetable and egg or eggwhite mixture looks cooked and firm, take a spatula full of the mixture and turn it over. Continue this process until all of the egg and vegetable mixture has been turned over to fully cook.
This process takes just a minute or two and then turn off the heat of the stove burner.


With your serving platter nearby, scoop up portions of the vegetable and egg or eggwhite mixture to the serving platter.

Tuesday, July 26, 2011

Official One Year Blogaversary July 27, 2011

Cupcake with candle (from Creative Commons Search IE)

Here is my symbolic First Blogaversary Cupcake to share with you.

As I mentioned in a previous post during my First Blogaversary Week, July 27, 2010 was the beginning of my adventures in food blogging. I have enjoyed this past year and thank you to all who helped me learn new skills, improve on my writing posts, and challenged me to take better food photos.

I have connected with many food bloggers and remain impressed with how dedicated you all are to your passions. My collection of favorite blogs continues to grow and I enjoy collecting your "Grab-a-button" to share on my Prep2eat site. I also have a shiny, new "Grab-a-button" in place in my collection. Please take a moment to "Grab" one and post on your blog to connect our sites and share our recipes.

Prep2eat will continue to inspire home cooks to prepare healthy, nutritious meals along with special tasty treats. Why cook at home? You have control over the quality of the food you purchase and monitor the prices of products and produce you buy for your consumption. It is a win-win solution for you and your family: daily meals are cooked with your choices and you save money by eating-in, rather than eating-out. No paying another person to prepare your food and tip them for doing so! What quality food are they preparing for you? At home, cooking extra portions allows for lunches or no-cook dinners on busy nights. With cooking-in during the week you probably will be able to enjoy a dinner out on a special occasion. But, you might just find that you enjoy your cooking better, like I do :) I can treat myself very well with fresh food here in my home.

Thank you to all my Followers of Prep2eat.
Warm regards and keep on cooking,
The Souper

Friday, July 22, 2011

Salmon Salad - No Mayo - My First Blogaversary Gift To You

Fresh Salmon Salad - No Mayo

Here is my gift to you during the week of my First Blogaversary :)
Last July 2010, I created Prep2eat. As my first adventure into the blogging Foodie World, I am so happy to offer you this healthy, nutritious, fresh and flavorful recipe for my version of Salmon Salad.

My goal for blogging here at Prep2eat is to inspire home cooking without intimidation in the kitchen. If I assisted in any way to help you eat healthier and save some money at the same time, then I have achieved my goal. Hopefully my food photos have caught your eye to investigate further what I am preparing in my kitchen.

Most important education from my food blogging experience this past year is that I have networked with so many "foodies" just like me! I have learned how to write posts with more focus on details from following advice of authors and publishers I interacted with online. I have found my Voice. Thank you so much for your feedback and advice! Thank you also to my followers here at Prep2eat as well as on Twitter (@soupiton). I have so much fun getting to know you and learning from you. :)

This Salmon Salad Recipe has been adapted from a recipe I found that had fresh mint, olive oil, shredded carrots and other good things. What caught my eye to create my version of Salmon Salad was no mayo was used in this recipe! What keeps the price of preparing this recipe down is using canned, Alaskan Red Sockeye Salmon - an excellent source of Omega 3's and not farm-raised salmon. Fresh Sockeye Salmon is wonderful, but not available all year round and it is very expensive for feeding several people.
Therefore, I can have a very healthy, nutritious, economical meal any time of the year!

Ingredients:
One Can Alaskan Red Sockeye Salmon
Olive Oil, two tablespoons
One Carrot, grated on box grater
Cucumber, one half, peeled and grated or cut into small pieces.
Tarragon, one teaspoon dried.
Dill, one teaspoon dried.
Zest of one fresh Lemon
Juice of one half of fresh lemon.
Flat Leaf Parsley, fresh, chopped: two tablespoons (optional)

Serving suggestions: Put Salmon Salad in a sandwich, hot dog bun or serve with healthy tortilla chips.

Ingredients for Fresh Salmon Salad - No Mayo

Preparation:
Large Bowl
Can Opener
Kitchen Knife
Box Grater
Zester
Measuring Spoons
Large Spoon
Strainer

Plain, drained Salmon

With a can opener, carefully open the can of salmon.
Drain the liquid from the can of salmon using a strainer.
Put drained salmon into a large bowl.
Separate out the large bones and skin from the salmon.
(small bones are ok to keep in. they have lots of calcium.)
Add the olive oil into the bowl with the drained salmon.
Add the grated carrots into the bowl.
Add the grated or chopped cucumber into the bowl.
Add the dried Tarragon and Dill into the bowl.
Add the lemon zest along with lemon juice.
Add the chopped, fresh parsley. (optional.)
Mix all the ingredients together with a large spoon.

Thursday, July 7, 2011

Photos from Westborough Farmers Market July 7, 2011

Summer is finally here in the Northeast. The growing season is short, so visits to the local Farmers' Markets are extremely special and well worth visiting.

As you will see from my photos from today's visit to the local Farmer's Market, the choices of fresh fruits and vegetables were plenty. The fresh baked breads were so beautiful as well as home baked goodies.

Everyone was so friendly and helpful. I am going to prepare fresh Russian Kale this evening for a side dish: saute with olive oil, chopped fresh garlic and pinch of red pepper flakes.

Definitely will have a slice of the fresh, five-grain bread I chose at the market.

And of course, I already cut into the Yummy Mummy Brownie wedge...oh so moist as you can tell from the brownie sticking to the knife :)

Enjoy my photos. They speak for themselves. Hope you are inspired to visit your local Farmers' Market soon.

The Souper

Strawberries

Raspberries

Zucchini

Honey

Onions

Hot Pepper Jelly

Bread

Bread II

Bread III

Russian Kale

Sugar Snap Peas


My Yummy Mummy Brownie Wedge (before)

My Yummy Mummy Brownie (after digging in) Oh, so moist :)

Can't wait for next week 'cause I am going back to this Farmers' Market.

Steak and Summer Salad

Grilled Steak with Fresh Summer Salad - July 2011 - Guest Photo/Recipe
By Alexa for Prep2eat

Imagine being a newlywed couple about to celebrate your first wedding anniversary. Your first year of marriage included new jobs, grad school and a recent move into a new apartment. Ah, more space to live in and a shiny new kitchen with stainless steel appliances.

When and what will be the first homecooked meal after the unpacking? With pots and pans and small appliances all set to perform culinary magic, the inspiration came for Alexa to surprise her husband, Rob, with a juicy steak. Who wouldn't hurry home with that vision stimulating the tastebuds?

Along with the mouthwatering protein as the star on the dinnerplate, the supporting side of a fresh, summer salad completes the show.

The first homecooked meal in the new apartment was a huge success! Here is how the magic began with Alexa creating a marinade of flavor sensations for the awaiting steak.

As I like to say, "Nobody in the world is eating this meal. I created it just for you." This steak dinner is the homecooking-magic Alexa prepared for her husband, Rob.

The Souper

What you will need for this meal:
Fresh steak, cut of choice
Large plastic ziplock bag for marinating the steak
Measuring cups and measuring spoons
1/4 cup Teriyaki Sauce
1/4 cup Worcestershire Sauce
1/2 teaspoon garlic, crushed or minced
One teaspoon cinnamon
1/2 teaspoon red pepper flakes

Kitchen supplies and utensils:
Tongs
Large frying pan or grill pan. (Option, outdoor grill)
Large platter for cooked steak
Aluminum foil for covering the cooked steak on the platter
Large salad bowl
Wooden salad utensils
Vegetable peeler
Kitchen knife
Serving fork for cooked steak

Add the steak and seasoning ingredients mentioned above into the large ziplock bag, close tightly, and shake all the ingredients completly to cover the steak.
Place the ziplock bag with the marinating steak into the refrigerator for about an hour before grilling.

Cooking process:
If pan searing, cook the marinated steak on medium-high heat. Medium-rare will take about 4-5 minutes per side depending on the temperature of your stove-top burner. Option: grill the steak on an outside bar-b-que grill on medium setting for heat. Check the steak often to see how it is cooking.

Testing doneness of meat: Press your finger into the center of the cooking meat. If your finger dips into the center it is cooked very rare. If your finger does not dip into the center of the cooking meat, the meat is well-done. Anywhere in the midpoint of dipping your finger into the cooking meat will mean medium-rare to medium-well doneness.

When the steak has been seared or grilled to your liking, pick up the cooked steak with clean tongs and put the steak onto a large platter. Cover the cooked steak with aluminum foil so that the steak will rest, allowing the juices to settle back into the meat. Rest the steak on the platter, covered with aluminum foil for about 20 to 30 minutes.

While the steak is resting, prepare the summer salad:

Ingredients for this salad are:
Romaine lettuce, 2-4 large leaves, enough for two people.
One carrot, shaved
Fresh cherries, pitted and sliced (amount is up to you)
Cranberries, dried (amount is up to you)
Avocado, cut in half and taken out of covering, cube the flesh of avocado
Feta cheese, fat-free (optional)

Combine all the ingredients for this summer salad into a large salad bowl.

Dressing for summer salad
Pyrex glass dish or bowl, safe for microwave oven
Large spoon or whisk
Extra Virgin Olive Oil, 1/2 cup
Balsamic Vinegar, 1/4 cup
Orange Marmalade, 1 tablespoon

After putting the above indredients for the salad dressing into the Pyrex glass dish or bowl, whisk gently to blend.
Take the whisk out and put the Pyrex glass dish or bowl into the microwave oven for just about five seconds, on high setting. This will heat the ingredients a little in order to blend better. After taking the Pyrex glass bowl or dish out of the microwave oven, use the whisk to blend the indredents again.

Just before serving the summer salad, pour the dressing over the salad and mix lightly with wooden salad utensils.

To plate the meal:
Slice the steak and put a few slices on an individual dinner plate. Serve a portion of the salad along with the steak on the same dinner plate.

Wednesday, June 22, 2011

Vegetable Dip - Roasted - Mixed with Hommus and Goat Cheese

My Vegetable Dip

Inspired by an appetizer served in a local restaurant, I created my own version of roasting vegetables and combining them with plain hommus and French goat cheese. Wow, this took a dip to a much higher, complex level.

Definitely not boring and very healthy served with cut fresh vegetables and a hearty chip or toasted whole grain bread slices. Impress yourself with a nutritious snack or appetizer.

Optional: Save even more time in preparing this dip by purchasing roasted red peppers or eggplant from your supermarket or specialty food store.

What you will need for this recipe:

Cutting board
Kitchen knife
1 Red pepper, fresh and sliced with seeds removed.
1 Eggplant, cut in half.
1 Garlic clove, whole and not peeled.
1 Tbs. Kosher salt
2-3 Tbs. Olive Oil
1 Baking sheet, lined with parchment paper.
Oven mitts
1/2 Cup Chavrie Goat Cheese (or goat cheese of your choice)
2 Cups Cedar's All Natural Hommus, original flavor (or hommus of your choice.)
Food processor or immersion blender
Large spoon
Parsley, fresh, chopped

Ingredients for my Vegetable Dip


Directions:

Put oven rack in middle area of the oven.
Preheat oven at 410 degrees F.
On the cutting board and with a kitchen knife, slice red peppers.
and cut the eggplant in half lengthwise.
Put the vegetables with the garlic on the lined baking sheet.
Drip the olive oil all over the fresh cut vegetables before roasting in the oven.

Before roasting

Roasted vegetables

Roast the vegetables in the preheated oven until a little brown color is appearing and vegetables are soft. This will take about 20 minutes.
Let the roasted vegetables cool and then cut the red pepper into small pieces on the cutting board with the kitchen knife.
Add 1/4 Cup roasted red peppers to the food processor.
Spoon out the inside of the roasted eggplant and throw away the skin of the eggplant.
Add 1/4 Cup roasted eggplant to the food processor also.
Peel the whole roasted garlic. Put the roasted garlic flesh into the food processor with the other roasted vegetables.
Add the hommus and goat cheese to the mixture in the food processor.
With the cover on the food processor, blend the mixture at slow speed until a desired texture is reached.
The goat cheese should be blended into the vegetables and hommus with few large lumps of cheese. Leave lumpy if desired.
With the food processor off, take the lid off and take a spoonful of the vegetable dip to taste.
Add a little more salt if you want a saltier flavor.
Put the top back on the food processor, and blend slowly for another minute to mix thoroughly if you added more salt.
With food processor off, take the lid off and spoon out the vegetable dip into a serving bowl.
Sprinkle chopped parsley on top of the vegetable dip for a garnish to add some color on top.

Monday, June 20, 2011

Pita Chips - Baked

Pita Chips - Preparation before baking.
Pita Chips - Baked - Photo below this recipe.

What you will need:
Round pita bread, small size
Cutting board
Bread knife
Large baking sheet
Parchment paper
Pastry brush (optional)
Olive oil
Kosher salt
Tarragon, 2-3 tablespoons,dried

Directions:
Preheat oven to 375 degrees F.
Cut each whole pita bread into halves, then each half into halves.
Continue cutting until the desired size.
Open each section and separate.
Place the sections on a lined baking sheet with parchment paper.
Either brush or drip olive oil on each pita bread section.
Sprinkle Kosher salt all over the pita bread sections.
Sprinkle tarragon over all the pita bread sections.
Put tray of prepared pita bread sections into the oven until they brown.
(about 5 min. depending on your oven.)

Goat Cheese Chip Sandwiches

Goat Cheese Chip Sandwiches

How simple is this crunchy, creamy snack or appetizer? Aren't they cute?
After a weekend of entertaining, I found myself left with a bag of my favorite chips/crackers and goat cheese. It took less than one minute to place some goat cheese directly onto the chip and top it with another chip. Dipping the chip into the goat cheese would result in breaking the chip therefore leaving a messy, crumble in the goat cheese.

If you want a totally satisfying snack for yourself, your kids or for a tray of appetizers to serve guests, this is the no bake, no cook, no fuss solution for your tastebuds.
Option Mix goat cheese with cream cheese for a little different flavor.

My chip/cracker of choice is from the collection of Food Should Taste Good, called Multigrain. This is a gluten-free chip that has many healthy grains creating a hearty, satisfying flavor.

My favorite goat cheese is Chavrie, also gluten-free.

Ingredients:
Food Should Taste Good Chips - Multigrain
Chavrie Goat Cheese
Option: mix goat cheese with cream cheese

Directions:
Spread some goat cheese onto one chip.
Put another chip on top of the goat cheese.
Press gently to make a chip sandwich.