Spices

Spices
Showing posts with label vegetables. Show all posts

Wednesday, August 1, 2012

Vegetable Ragu

Vegetable Ragu
by The Souper

Entering my second year of blogging at Prep2eat, I am sharing with you one of my favorite recipes for Vegetable Ragu. This dish utilizes summer produce in a healthy, hearty, spicy and comforting meal. Cooking a large amount one time allows a home cook to recreate several meals from the original creation. I like to use the word "creation" because personal choices go into the total recipe. Creativity makes a unique dish.

A traditional Ragu by definition is "an Italian culinary staple that refers to any sauce to which meat is added." This comes from online website of wiseGEEK http://www.wisegeek.com/what-is-ragu-sauce.htm 
Also from this same website: "The actual word Ragu is derived from the French word ragout which translates to stew. The French verb ragouter literally means to stimulate appetite."

Enjoy visiting your local Farmers' Markets in season to bring home the fresh produce for your home cooking creations.

Serving suggestions:
Use as a side dish to a protein meal of cooked meat or chicken.
Cut leftover, cooked hamburgers or chicken into leftover Vegetable Ragu and reheat for a quick meal with protein.
Cook pasta or rice and add to cooked Vegetable Ragu to increase amount of a side dish.

Cooking time for Vegetable Ragu after prep: about 30 minutes depending on the amount of ingredients used.

Vegetable Ragu  (one version)

Ingredients:
Olive oil or canola oil, three tablespoons
Onion, one small or half medium
Garlic cloves, two or three
Zucchini, small
Summer squash, small
Carrot, one medium
Broccoli, fresh or frozen, two cups
Tomatoes, one 28 ounce can, crushed
Tomato paste, 12 ounce can
Water, two cups or more (as needed)
Kosher salt, two teaspoons (add more as needed for tasting)
Crushed black pepper, one teaspoon (add more as needed for tasting
Sugar, two teaspoons (add more as needed for tasting)
Optional:
Red pepper flakes, one quarter teaspoon (add more as needed for tasting)

What you will need:
Cutting board, large
Vegetable peeler
Kitchen knife
Small mixing bowls (two)
Large mixing bowls (one)
Can opener
Fry pan, large
Wooden spoon
Table spoon
Pot holder
Serving platter or large serving bowl
Serving spoons, large

The Prep:
Bring all cooking supplies to central prepping area of your kitchen.
Wash and dry all fresh produce.
Peel produce such as carrots.
Take skin off onion and garlic
Wash and dry the top of cans before opening.
Cut fresh produce into cubes of same size.
Put cut onions into one bowl.
Keep cut garlic cloves separate in small bowl.
Put remaining cut produce into a large bowl

Cooking Process:
Add oil into large frying pan and turn stove burner to medium high heat for one minute.
To the heated oil in the frying pan, add cut onions and stir with wooden spoon until color of onions turns shiny, opaque color.
Add salt during the stirring of cooking onions.
Add cut garlic cloves to the cooking onions and continue to stir the mixture for a minute.
Add remaining cut vegetables, crushed black pepper and optional red pepper flakes.
Keep stirring the cooking vegetables and lower stove burner temperature to medium heat.
When cooking vegetables soften, after about three minutes or more if needed, add the can of crushed tomatoes, tomato paste, sugar and water.
Stir slowly to combine all of the mixture together.
Keep stirring and add more water if sauce is becoming too thick and continue to stir the mixture.
Lower stove burner temperature to low setting and keep stirring the cooking sauce.
With a clean table spoon, carefully taste the cooking sauce and add more salt, sugar and/or crushed black pepper to a flavor that is pleasing to you.
Turn off the stove burner and carefully put the cooked ragu sauce into a large serving bowl.




Tuesday, December 13, 2011

Lasagne

This Lasagne is both Gluten-free and Non-dairy

It was exciting to find a lasagne pasta made of brown rice so that I could prepare a gluten-free lasagne for people on a restricted diet AND while thinking about dietary needs of others, I decided to make this recipe for lasagne to be dairy-free as well. Did I have concerns how this recipe was going to turn out? You bet I did. Did I have concerns about how a lasagne without cheese would hold up in the cooking process? You bet I did, again.

I am happy to report that this lasagne with ground beef and sauted vegetables turned out to be one of the best tasting culinary experiments I have prepared. There was an abundance of flavor in this meat lasagne from the spiced-up seasonings used during the cooking of the ground beef. The sauted veggies of choice for this recipe added their own flavor and texture to the entire lasagne. How surprised was I? Very surprised and satisfied with this homemade creation.

Although I technically am not restricted to a gluten-free diet, I enjoy the wonderful new products appearing in the markets for those restricting gluten in their nutritional diets. A personal observation: when eating too much bread or white pasta, I find a bloated feeling after a meal and see more puffiness under my eyes. Again, this is just a personal observation. The same feeling is personally observed when eating a lot of dairy products. So, good to know that substitutions of ingredients still allows for a hearty flavor in favorite meals.

Noting here that I chose ingredients for this lasagne without promoting any products. I enjoy their flavors.

Gluten-free, brown rice lasagne pasta. Organic and Kosher, too.

Organic Tomato Sauce with Herbs (no cheese)

What you will need to prepare this dish:
Large pot with matching lid
Colander
Tongs
Large skillet
Large cutting board
Kitchen knife
Box grater
Wooden spoon, two
Pot holders
Large lasagne pan or high baking dish
Olive or Canola Oil spray
Baking sheet
Large spatula

Ingredients:
Lasagne pasta, gluten-free
Olive oil, 3-4 tbs for sauteing vegetables and ground beef.
Small onion, chopped
Garlic, 3 cloves, fresh and chopped
Carrot, 1 large, washed, peeled and grated
Red or Green pepper, 1 medium, washed and cut into small pieces
Butternut squash, 1 cup, fresh, cut into small pieces
Zucchini, 1 small, washed, cut into small pieces
Kosher salt, 1-4 tbs (add half of total amount during vegetable saute; add some salt to taste during cooking process after the ground beef is added but save some salt to add to boiling water for cooking pasta)
Black pepper, 1 tsp, crushed
Ground beef, 1 lb, lean OR White ground meat turkey, 1 lb.
Tomato sauce, one jar prepared tomato sauce of choice (with/without added herbs, but no cheese.)
Tomato paste, 4 tbs from tube or small can
Water, 1 cup, cold (add half of the water to determine thickness of mixture)
Tumeric, 1 tsp, powder
Smoked paprika, 1 tsp, powder
Oregano, 1 tsp, dried
Basil, 1 tsp, dried
Gluten-free bread crumbs

Lasagna Preperation Process:
Fill the large pot with cold water, put lid on the pot and put the pot on a stove burner, high heat, to bring water to a rolling boil. This will take 8-10 minutes depending on your stove temperature. When large bubbles appear in the boiling water, remove the lid, add some Kosher salt and carefully add the dried lasagne pasta. Stir gently to separate each noodle so they do not stick together.
When all the lasagne pasta is softer, but still firm, turn off the burner under the pot, put the colander in the sink and carefully lift the pot with pot holders and slowly drain the boiling water from the pot leaving the partially cooked lasagne pasta in the collander.
While the water is reaching a boiling temperature, preheat your oven to 375 degrees.
At this time put the large skillet on another stove burner, add the olive oil into the skillet and turn the burner under the skillet to medium-high heat. In a minute or two, carefully add the chopped onion and stir around the skillet with a wooden spoon. When the onions look softer add the rest of the vegetables and keep stirring the mixture. Add some of the Kosher salt and all of the crushed black pepper. Keep stirring the mixture with the wooden spoon.
When all the vegetables look softer, add the uncooked ground beef (or ground turkey), add all of the herbs, the tomato paste and continue to stir with the wooden spoon until the ground beef (or ground turkey) turns brownish, more firm looking texture to the meat. Then, add 3/4 of the jar of tomato sauce. (save 1/4 of the tomato sauce for the top of the lasagne before baking)
Keep stirring the mixture above and then add the water, as much as needed for the desired consistancy of the mixture. The mixture of vegetables, meat and sauce should not be too watery.
Turn the temperature under the skillet with cooking mixture to a low setting and keep stirring with the wooden spoon until cooking mixture is fully heated and bubbles begin to form in the mixture.
Turn the burner off under the skillet after the mixture is hot and bubbly.
Spray the large baking dish with some olive oil spray to keep the bottom of the lasagne from burning while baking.

The Layering Process Before Baking:
With a clean wooden spoon, add a little bit of the cooked mixture from the skillet to the bottom of the baking dish.
With tongs, carefully take several partially cooked lasagne pasta and put them on top of the first layer of cooked ground beef (or ground turkey) and vegetable mixture. Add a bit more cooked mixture on top of the lasagne pasta and repeat this process until the top layer is cooked meat and vegetable mixture.
Add a thin layer of gluten-free bread crumbs for a crunchy topping (optional)
Add last 1/4 of jar of tomato sauce to the top of the lasagna.
Put the baking dish on a clean baking sheet so oven will not get messed up if the cooking lasagne overflows with tomato sauce.
Put the baking sheet with the lasagne baking dish on it into the preheated oven.
Bake the lasagne for about 20-30 minutes until heated totally in the middle.

Serving suggestions:
Cut the cooked lasagne into large squares and serve each individual portion with a spatula on a dinner place.

Wednesday, August 3, 2011

New Potato and Vegetable Scramble

New Potato and Vegetable Scramble

What is like a Scavenger Hunt? My weekly visit to my local Farmers’ Market starts off with my list in hand, ready to gather fresh produce and baked goodies to bring home to enjoy. As soon as I reach my destination, my excitement builds, my eyes dance around from the assembled tables of each vendor, and I forget the items on my list and buy with my eyes! Knowing the produce I select has not traveled far from the very ground it grew in, makes my choice of vegetables even more special.

Each week the farmers bring the most seasonal offerings to the market. This week I purchased adorable, little new red potatoes. My mind was racing with so many ideas on ways to prepare these little beauties. Then I chose some sweet corn and in my mind I could immediately taste the sweet little kernels dripping in melted butter and sprinkled with a bit of salt to bring out even more corn flavor. Glancing back at my prepared list, I did pick up some summer squash, zucchini and my weekly brownie treat.

With so many recipes to create with my new little red potatoes, I could easily make a sensational mashed potato side dish. Roasting these little ones would bring out their sweet, hearty flavor enhancing their goodness with olive oil, salt and pepper enabling the potatoes to brown and develop a crispy outside surface.

The recipe I would like to share with you is one for a nutritious, comfort breakfast. Starting off a new day with a filling, healthy breakfast allows me to have energy to get on with the day and to reduce hunger cravings before my next meal at lunch time.

I call this recipe New Potato and Vegetable Scramble. Why? This dish is filled with fresh vegetables blended together with the protein of whole eggs or just egg whites, brought together as one meal filled with flavors from seasonings such as salt, pepper and paprika. As the nutritional experts tell us, "eat vegetables and good proteins." The simplicity of all the ingredients produce mouth-watering comfort. You know you have had a good meal after the full feeling you experience after this hearty breakfast, almost wishing for more comfort, but knowing you are totally satisfied and can eat no more.

Total Preparation Time approximately 10 minutes.
Total Cooking Time approximately 10 minutes.

Here are the ingredients you will need for this recipe:


Ingredients for Two Servings:
Olive Oil, 2 tablespoons.
Butter or Vegan Buttery Spread, 1/4 cup.
Vidalia or Sweet Onion, 1/2, chopped
Summer Squash, one small, cut into small pieces
Red New Potatoes, 2-3 small potatoes, cut into small pieces
Large Eggs, 4 whole or optional 7 Eggwhites only, for fewer total calories.
(optional: prepared EggBeaters or Eggwhites from supermarket.)
Kosher Salt, 1 teaspoon
Black Pepper, crushed, 1/2 teaspoon.
Paprika, 1 teaspoon


What you will need:
Large cutting board
Kitchen knife
Large frying pan
Spatula
Small bowl
Whisk or fork
Measuring spoons
Serving plate or bowl

Preparation:
Wash the summer squash, red potatoes and dry them.
With the kitchen knife, cut the onion, summer squash and red potatoes on the cutting board.
Crack the whole eggs into the small bowl and whisk together to blend or if using just eggwhites, separate the eggs into two small bowls. Save the yokes in a covered small bowl and place in the refrigerator. Discard yolks if not using for future recipes.
Put the frying pan on the stove burner and turn heat up to medium-high temperature.
Immediately add the olive oil and the butter at the same time to allow for maintaining the high temperature without burning the vegetables and eggs during the cooking process.


Add the onions into the melted butter and olive oil in the frying pan, keep stirring around with the spatula so the onions do not burn.
Sprinkle some of the salt to bring out the liquid of the cooking onions.
When the cooking onions look shiny and opaque, not clear, then add the summer squash and keep stirring around the vegetables with the spatula.
At this time add more of the salt and the crushed, black pepper.
Now add the cut red potatoes into the cooking onions and summer squash, keep stirring around so these vegetables do not burn.
Sprinkle the paprika on the cooking vegetables and keep stirring.
When the potatoes look softer and a little brown in color, turn down the stove burner to Low Heat.
Add the eggs or eggwhites and let the liquid of the eggs settle smoothly on and around the cooking vegetables.
When the eggs or eggwhites look firm, take the spatula and carefully slip it between the side of the frying pan and the outside edges of the cooking eggs or eggwhites. This keeps the eggs or eggwhites from sticking on the sides of the frying pan and allows for other liquid from the eggs or eggwhites to settle into the outside of the cooking vegetable and egg mixture.
When the vegetable and egg or eggwhite mixture looks cooked and firm, take a spatula full of the mixture and turn it over. Continue this process until all of the egg and vegetable mixture has been turned over to fully cook.
This process takes just a minute or two and then turn off the heat of the stove burner.


With your serving platter nearby, scoop up portions of the vegetable and egg or eggwhite mixture to the serving platter.

Thursday, July 7, 2011

Photos from Westborough Farmers Market July 7, 2011

Summer is finally here in the Northeast. The growing season is short, so visits to the local Farmers' Markets are extremely special and well worth visiting.

As you will see from my photos from today's visit to the local Farmer's Market, the choices of fresh fruits and vegetables were plenty. The fresh baked breads were so beautiful as well as home baked goodies.

Everyone was so friendly and helpful. I am going to prepare fresh Russian Kale this evening for a side dish: saute with olive oil, chopped fresh garlic and pinch of red pepper flakes.

Definitely will have a slice of the fresh, five-grain bread I chose at the market.

And of course, I already cut into the Yummy Mummy Brownie wedge...oh so moist as you can tell from the brownie sticking to the knife :)

Enjoy my photos. They speak for themselves. Hope you are inspired to visit your local Farmers' Market soon.

The Souper

Strawberries

Raspberries

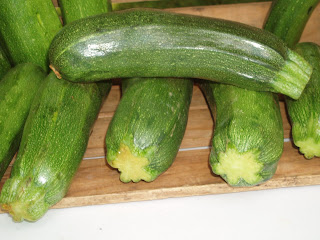
Zucchini

Honey

Onions

Hot Pepper Jelly

Bread

Bread II

Bread III

Russian Kale

Sugar Snap Peas


My Yummy Mummy Brownie Wedge (before)

My Yummy Mummy Brownie (after digging in) Oh, so moist :)

Can't wait for next week 'cause I am going back to this Farmers' Market.

Steak and Summer Salad

Grilled Steak with Fresh Summer Salad - July 2011 - Guest Photo/Recipe
By Alexa for Prep2eat

Imagine being a newlywed couple about to celebrate your first wedding anniversary. Your first year of marriage included new jobs, grad school and a recent move into a new apartment. Ah, more space to live in and a shiny new kitchen with stainless steel appliances.

When and what will be the first homecooked meal after the unpacking? With pots and pans and small appliances all set to perform culinary magic, the inspiration came for Alexa to surprise her husband, Rob, with a juicy steak. Who wouldn't hurry home with that vision stimulating the tastebuds?

Along with the mouthwatering protein as the star on the dinnerplate, the supporting side of a fresh, summer salad completes the show.

The first homecooked meal in the new apartment was a huge success! Here is how the magic began with Alexa creating a marinade of flavor sensations for the awaiting steak.

As I like to say, "Nobody in the world is eating this meal. I created it just for you." This steak dinner is the homecooking-magic Alexa prepared for her husband, Rob.

The Souper

What you will need for this meal:
Fresh steak, cut of choice
Large plastic ziplock bag for marinating the steak
Measuring cups and measuring spoons
1/4 cup Teriyaki Sauce
1/4 cup Worcestershire Sauce
1/2 teaspoon garlic, crushed or minced
One teaspoon cinnamon
1/2 teaspoon red pepper flakes

Kitchen supplies and utensils:
Tongs
Large frying pan or grill pan. (Option, outdoor grill)
Large platter for cooked steak
Aluminum foil for covering the cooked steak on the platter
Large salad bowl
Wooden salad utensils
Vegetable peeler
Kitchen knife
Serving fork for cooked steak

Add the steak and seasoning ingredients mentioned above into the large ziplock bag, close tightly, and shake all the ingredients completly to cover the steak.
Place the ziplock bag with the marinating steak into the refrigerator for about an hour before grilling.

Cooking process:
If pan searing, cook the marinated steak on medium-high heat. Medium-rare will take about 4-5 minutes per side depending on the temperature of your stove-top burner. Option: grill the steak on an outside bar-b-que grill on medium setting for heat. Check the steak often to see how it is cooking.

Testing doneness of meat: Press your finger into the center of the cooking meat. If your finger dips into the center it is cooked very rare. If your finger does not dip into the center of the cooking meat, the meat is well-done. Anywhere in the midpoint of dipping your finger into the cooking meat will mean medium-rare to medium-well doneness.

When the steak has been seared or grilled to your liking, pick up the cooked steak with clean tongs and put the steak onto a large platter. Cover the cooked steak with aluminum foil so that the steak will rest, allowing the juices to settle back into the meat. Rest the steak on the platter, covered with aluminum foil for about 20 to 30 minutes.

While the steak is resting, prepare the summer salad:

Ingredients for this salad are:
Romaine lettuce, 2-4 large leaves, enough for two people.
One carrot, shaved
Fresh cherries, pitted and sliced (amount is up to you)
Cranberries, dried (amount is up to you)
Avocado, cut in half and taken out of covering, cube the flesh of avocado
Feta cheese, fat-free (optional)

Combine all the ingredients for this summer salad into a large salad bowl.

Dressing for summer salad
Pyrex glass dish or bowl, safe for microwave oven
Large spoon or whisk
Extra Virgin Olive Oil, 1/2 cup
Balsamic Vinegar, 1/4 cup
Orange Marmalade, 1 tablespoon

After putting the above indredients for the salad dressing into the Pyrex glass dish or bowl, whisk gently to blend.
Take the whisk out and put the Pyrex glass dish or bowl into the microwave oven for just about five seconds, on high setting. This will heat the ingredients a little in order to blend better. After taking the Pyrex glass bowl or dish out of the microwave oven, use the whisk to blend the indredents again.

Just before serving the summer salad, pour the dressing over the salad and mix lightly with wooden salad utensils.

To plate the meal:
Slice the steak and put a few slices on an individual dinner plate. Serve a portion of the salad along with the steak on the same dinner plate.

Wednesday, June 22, 2011

Vegetable Dip - Roasted - Mixed with Hommus and Goat Cheese

My Vegetable Dip

Inspired by an appetizer served in a local restaurant, I created my own version of roasting vegetables and combining them with plain hommus and French goat cheese. Wow, this took a dip to a much higher, complex level.

Definitely not boring and very healthy served with cut fresh vegetables and a hearty chip or toasted whole grain bread slices. Impress yourself with a nutritious snack or appetizer.

Optional: Save even more time in preparing this dip by purchasing roasted red peppers or eggplant from your supermarket or specialty food store.

What you will need for this recipe:

Cutting board
Kitchen knife
1 Red pepper, fresh and sliced with seeds removed.
1 Eggplant, cut in half.
1 Garlic clove, whole and not peeled.
1 Tbs. Kosher salt
2-3 Tbs. Olive Oil
1 Baking sheet, lined with parchment paper.
Oven mitts
1/2 Cup Chavrie Goat Cheese (or goat cheese of your choice)
2 Cups Cedar's All Natural Hommus, original flavor (or hommus of your choice.)
Food processor or immersion blender
Large spoon
Parsley, fresh, chopped

Ingredients for my Vegetable Dip


Directions:

Put oven rack in middle area of the oven.
Preheat oven at 410 degrees F.
On the cutting board and with a kitchen knife, slice red peppers.
and cut the eggplant in half lengthwise.
Put the vegetables with the garlic on the lined baking sheet.
Drip the olive oil all over the fresh cut vegetables before roasting in the oven.

Before roasting

Roasted vegetables

Roast the vegetables in the preheated oven until a little brown color is appearing and vegetables are soft. This will take about 20 minutes.
Let the roasted vegetables cool and then cut the red pepper into small pieces on the cutting board with the kitchen knife.
Add 1/4 Cup roasted red peppers to the food processor.
Spoon out the inside of the roasted eggplant and throw away the skin of the eggplant.
Add 1/4 Cup roasted eggplant to the food processor also.
Peel the whole roasted garlic. Put the roasted garlic flesh into the food processor with the other roasted vegetables.
Add the hommus and goat cheese to the mixture in the food processor.
With the cover on the food processor, blend the mixture at slow speed until a desired texture is reached.
The goat cheese should be blended into the vegetables and hommus with few large lumps of cheese. Leave lumpy if desired.
With the food processor off, take the lid off and take a spoonful of the vegetable dip to taste.
Add a little more salt if you want a saltier flavor.
Put the top back on the food processor, and blend slowly for another minute to mix thoroughly if you added more salt.
With food processor off, take the lid off and spoon out the vegetable dip into a serving bowl.
Sprinkle chopped parsley on top of the vegetable dip for a garnish to add some color on top.

Friday, February 18, 2011

Fresh Tomato Sauce - Quick and Flavorful


The simplicity of preparing fresh tomato sauce amazes me. This magical creation comes together in a very short time. In approximately fifteen minutes, pasta with vegetables is on my dinner plate, ready to comfort me and my tastebuds.
Knowing that once a large pot of water comes to an active boil, pasta usually takes about eight minutes to cook. At the same time, cooking chopped vegetables and adding a few more ingredients turns into a sauce for my pasta.
It is only minutes for my fork to be twirling around in the pasta in my fresh tomato sauce.
Being prepared to cook is the secret for enjoying the process of creating fresh, delicious food in minutes.

What you will need for preparing this recipe:
Large pot with matching lid
Large frying pan
Chopping board
Kitchen knife
Wooden spoon
Large slotted spoon
Measuring spoons
Pot holders
Can opener
Large serving bowl
Large serving spoons

Ingredients:
Cold water to fill the large pot about 3/4 full
Olive Oil, regular not extra virgin. About 3-4 tablespoons.
Onion, one small or half of a large onion
Garlic, 3 cloves chopped
Peppers, one green or red pepper cut into small pieces. (Assorted colors make a nice presentation.)
Zucchini, one small size cut into small pieces
Cherry tomatoes, one cup or more, washed and cut in halves.
Tomato paste from a tube, 3-4 squirts from the tube
Canned tomatoes with no salt, 28 oz. size
Pasta, one pound box of personal choice variety
Kosher salt, 1-2 teaspoons
Sugar, 1-2 teaspoons, determined by personal taste.
Dried herbs, one teaspoon or less of any of the following:
Oregano, basil, tarragon
Red pepper flakes, 1/4 to 1/2 teaspoons depending on personal taste.
Optional: chopped fresh parsley for garnish.

Fill the large pot with cold water and put the cover on the pot.
Put the covered pot of water on stove burner and turn heat up to medium-high.
Wash and cut all vegetables.
Open the can of tomatoes.
Have all dry herbs available to measure.
Put the large frying pan on another stove burner and put the olive oil in the pan. Turn stove burner up to medium-high. In a minute when olive oil is heated, add chopped onions and stir around with the wooden spoon.
Add some of the Kosher salt to the cooking onions to help release their moisture and keep stirring.
Add the chopped garlic and all the chopped vegetables. Keep stirring the mixture.
When the vegetables look softer after a few minutes, add the tomato paste and keep stirring with the wooden spoon for another minute.
Add the canned tomatoes and keep stirring the sauce. At this time add some cold water to half of this can and add to the cooking sauce.
Add the dried herbs, more Kosher salt and sugar. Keep stirring the sauce.
Turn the heat under the sauce pan to low heat.
Carefully taste the sauce and adjust seasonings with more salt or sugar (canned tomatoes may have an acid taste.)

When the pot of water has large bubbles, add the box of pasta and stir with the slotted spoon.
Cook pasta for about eight minutes, taste a cooled piece of pasta for a bit of firmness. If soft, but still firm in middle, transfer the pasta from the pot by spoonfuls and put into the fry pan of tomato sauce still cooking on low heat.
The liquid from the cooked pasta will thicken the tomato sauce. (Always put pasta into sauce, not sauce over pasta say the experts.)
Depending on the amount of prepared sauce and amount of pasta, you have an option to add a bit more of the water from the large pot that the pasta cooked in to thicken the tomato sauce even more. It is a personal choice for the thickness of the sauce.
Gently blend the pasta into the tomato sauce carefully to not break the pasta.
Transfer the mixed pasta and tomato sauce to a large serving bowl to bring to your dinner table.

Serving Options:
Grated cheese of choice can be added to your sauce at serving time. Or, have grated cheese in a bowl on the dinner table for individuals to add on their own plates.
Fresh, chopped Parsley spinkled on top of the Fresh Tomato Sauce gives a truly clean, fresh look to your sauce creation.
A drizzle of Olive Oil on top of your pasta adds more flavor.
You will experience a smooth, burst of flavor in your mouth from the freshness of this dish.

Friday, September 17, 2010

Meatballs - Homecooking Happiness


Meatballs – The Healthy Way

A small round package of ground beef mixed with traditions of families. Eat alone as is or combined with tomato sauce to be ladled over fresh pasta, meatballs satisfy my meat cravings. How many families prepare these little bursts of flavor filled with the secrets of grandmas of many cultures? Here is a new twist on an old world favorite.
My recipe combines healthy add-ins to get more veggies into a meal creating a very moist ground beef mixture. Highly seasoned with lots of spices, these meatballs are not boring. Baking the newly-created version of my meatballs cuts down on calories as well. Serve as an appetizer or in a sauce over pasta. Watch your friends and family be surprised from this hearty creation.

The Prepping:
· Preheat your oven to 350 degrees F.
· With parchment paper, line a rimmed baking sheet.
· Have ready one pound of fresh ground beef (or defrost some from freezer.)
· Gather fresh vegetables, wash and chop into small pieces to mix into ground beef mixture.
· Organize add-ins for creating your meatballs: seasonings, spices & condiments of choice.
· Large mixing bowl.
· Oven mitts or pot holders.
· Wooden spoon for mixing; or mix with clean hands.
· Tongs or spatula for transferring cooked meatballs to a serving dish.

Ingredients: (choose any from list below or include your personal choices.)
One pound of fresh ground beef.
One egg
Ketchup, tomato paste, Worcestshire Sauce: all to personal taste.
Mustard: optional.
Chopped fresh onion.
Chopped fresh peppers: use different colors.
Chopped baby spinach: optional.
Chopped fresh zucchini/summer squash.
Grated cheese: optional.
Salt and ground black pepper
Dried oregano, basil, tarragon.
Dried cumin (more intense flavor); red pepper flakes (for heat): optional.
Seasoned bread crumbs or Panko flakes (do not include for Gluten-free meal.)
Enough to allow mixture to form a meatball.

Mix all the above ingredients in a large bowl. If not using bread crumbs, this mixture will be wetter but should still form a meatball. The size of the meatballs is up to you. For meals, a golf ball size is good. For an appetizer, make a smaller meatball.

Arrange the meatballs on the lined, rimmed baking sheet and put it into the preheated oven.
Bake until browned. (about 30+ minutes depending on your oven.) Your nose will tell you when they are done. Your kitchen will be filled with a delicious, inviting aroma of home cooking.

Serve with dipping sauces of choice.
A side salad completes a very healthy meal.
Serve bread or rolls on your table as an option.

Meatballs - The Healthy Way on FoodistaMeatballs - The Healthy Way

Saturday, July 31, 2010

Veggies Grilled, Roasted or Steamed

Think of your favorite veggies in spring,summer,fall and even winter. I like to buy veggies in season for freshness and lower price. Have you ever visited a local Farmer's Market? If not, take a little time to stroll through one. It can be an adventure! Imagine, purchasing veggies directly from the farmer who grew them? No shrink-wrapped packages, no box from a freezer from a supermarket. Hmmm, how much did that packaging cost you? Your veggies from a Farmer's Market did not take an airplane ride for you to spend more money to transport them.

Ok, so here is the prep: Wash, dry, peel if necessary any veggies of choice. Examples for grilling: Vidalia Onions (peeled,sliced); Zucchini (sliced lengthwise in thick strips); Peppers (cut into wide strips); Eggplant (unpeeled, sliced in wide, thick strips); Asparagus (cut off bottom tough ends.)

If grilling: use a mesh rack, place veggies on the rack. Brush with olive oil and sprinkle with Kosher salt. Have tongs ready to turn the veggies so they do not burn.

If roasting: Use a large baking sheet with rim (lined with parchment paper)or baking dish to serve in that can go into the oven. Brush the veggies with olive oil and sprinkle with Kosher salt. Preheat the oven to 400 degrees. Roast until veggies are soft and a little browned. The delicious smell will tell you when they are ready. Cooking time is about 20 minutes depending on your oven. Roasting brings out sweetness in veggies.

If steaming: Use a large pot with some water in the bottom. Use a steaming basket to put inside the pot. Cut your veggies of choice to fit in the steaming basket. Cover the pot when filled with veggies and turn heat first to a medium high, then when steaming begins, turn the heat down to low. Veggies take about five minutes to steam. The should not be soggy, but they should not be hard either. You will know when they are done with just a taste test.

Always make extra veggies as these make great leftovers to put into tomato sauces, egg scrambles, added to a sandwich, and even turned into a pureed soup with added broth.

Enjoy your veggies!